
Removing a Wall to Create an Open Floor Plan
- Matt Weber
- Apr 7
- 6 min read

With the popularity of open-concept living spaces, remodels often involve the removal of a load-bearing wall. Removing a wall can connect two rooms into one, opening the flow of the room for a shared living space.
Removing a load-bearing wall can dramatically change your home's layout, but it's a project that requires careful planning, structural understanding, and often professional guidance as it affects the entire framework of the house. Load-bearing walls support the structure above them and are designed to transfer weight from the roof, through the floors and down to the foundation. For example, exterior walls are almost always load-bearing, and walls that run perpendicular to the joists are load-bearing walls. If you have access to the original building plans, these can tell you if the wall supports any weight.
The construction costs for removing a load-bearing wall in a single-story home can range from $2,000-$5,000. If the job includes rerouting plumbing and electrical wiring, the cost
can increase dramatically, and second-story load-bearing walls can cost twice as much.
Check with your local building department for necessary permits. This project often requires approval due to structural changes. Some cities require inspections to determine if a wall is load-bearing before removal, and the costs mentioned above do not include permits or inspection fees.
When in doubt, hire a structural engineer to assess the wall. They can provide a plan for temporary supports and detail the new structural elements needed. The engineer will calculate the required load capacity and recommend an appropriate beam size.

Shown here is a wall dividing a kitchen and dining area which will be removed.
Tools & Materials
• Stud finder
• Hammer
• Reciprocating saw
• Pry bar
• Screw gun
• Screws and nails
• Level
• Tape measure
• Temporary support beams (2x4s, adjustable jack posts, or wooden beams)
• New beam (lumber, steel, or engineered wood)
• New studs or vertical framing
• Construction adhesive
• Bolts and metal brackets (if required)
• Safety gear (gloves, goggles, dust mask)
• Permits (if required)
• Drywall
• Paint
• Caulk
Design
Plan where the new framing support will go. This might involve installing beams, columns, or even a new wall elsewhere.
The new wall will typically need to be spanned with a load-bearing beam to transfer the load to the floor. A beam built of SPF dimensional lumber must be the same thickness as the wall framing, which requires insertion of 1/2-in. of insulation or plywood to bring the doubled 1-1/2 boards of the beam to the 3-1/2-in. depth of a typical framed wall. As an alternative, a structural engineer might suggest a beam made of steel or engineered wood.
The beam must be supported from below by solid framing on each end and book-ended by king studs. Consult local code guidelines for additional framing requirements in your area.
Preparation
If there are any electrical wires, plumbing, or HVAC ducts within the wall, shut off power, water, or heating/cooling systems before proceeding. Have a licensed electrician or plumber reroute any utilities as necessary.
Remove any furniture, decorations, and flooring that might get damaged or obstruct the work area. Close partition doors, mask off the interior with drop cloths, open windows, and set up portable fans to vent dust outside, because drywall demolition is messy work.
Gather all tools and construction materials on site before starting the removal process.


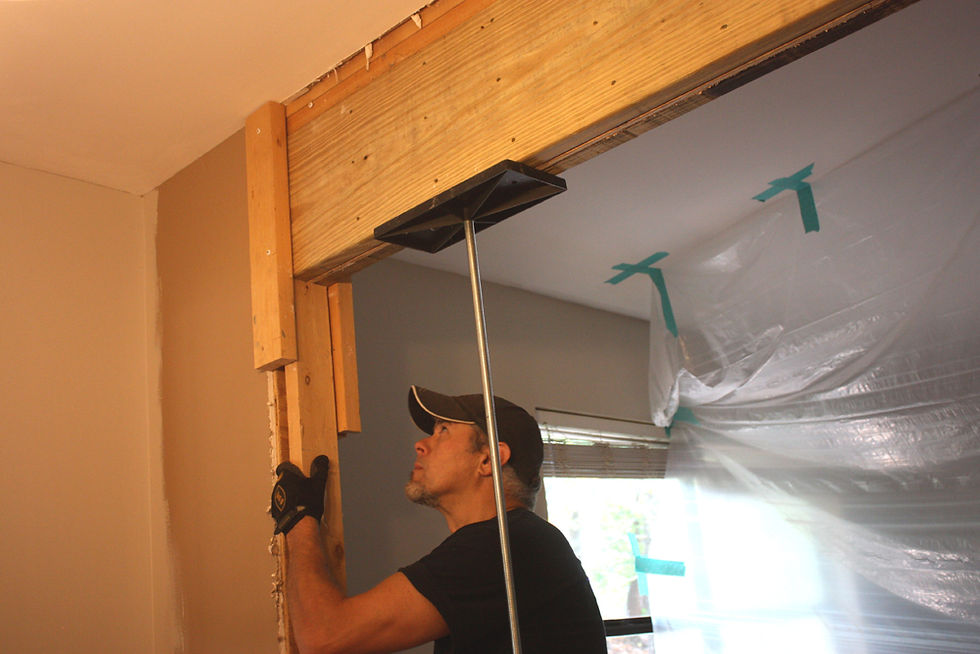
We drove a metal rod through the ceiling into the attic so we could easily pinpoint the work area from inside the attic. We found the rod inside the attic, which helped us locate the electrical lines to be relocated . (There were no plumbing lines present.)
Temporary Supports
Before removing the wall, design and set up temporary supports. This usually involves wood beams or jack posts placed at intervals parallel to the wall. To allow room to work, position the temporary supports approximately 3 to 4 feet on either side of the wall you're removing. These supports essentially comprise a temporary wall to carry the overhead load as the old wall is being removed and reconstructed. Professionals often use adjustable steel jack-posts to create a temporary wall. Make sure the temporary beams are level and securely fastened, distributing the load evenly. This is essential to avoid sagging or structural issues.

Although this wall ran parallel to the roof trusses like a partition wall, the framing above the door below supported the angled bracing of a hip roof. If the wall you’re removing is load-bearing at any point across its span, it will require temporary ceiling support and a replacement beam for removal.

Demolition
Start by removing drywall or plaster. Note that the smaller the pieces, the bigger the mess and more cleanup required. For drywall, use a utility knife or reciprocating saw to carefully
cut along the edges and seams. The HIR team recommends cutting strategic holes
in the panels and prying the panels away from the wall studs in large pieces rather
than smashing them into tiny bits with a sledgehammer.
Next, carefully take out the studs. A reciprocating saw can make quick work of the nails
at their tops and bottoms. Keep the area above the wall supported at all times.
If possible, salvage materials like wood or fixtures for reuse. Safely dispose of the drywall, studs, and any other materials. This project generates a lot of waste, so have a plan for disposal.


When removing drywall, you can reduce mess and cleanup by cutting along the seams and edges, removing large sections of the panels at a time.

Less breakage creates less dust and debris. Try to cut reveal seams and pry the panels from the edges rather than smashing the drywall into small pieces.


New Beam
Once the wall is removed, install the new beam that will support the load. The beam will span the entire length where the load-bearing wall stood. It should rest on sturdy supports
at either end, such as posts or columns that extend down to the foundation. A structural engineer can calculate the required load capacity and recommend an appropriate
beam size and type.


The old wall was replaced with a 4x12 beam. Note that this massive beam weighed a boatload once constructed. Hoisting it into place was not an easy task. For this reason, you might consider an engineered wood or steel beam specified by a structural engineer.
Be sure to follow the engineer’s specifications for how the beam should be installed. Lifting a heavy beam into place could require construction machinery or professional help.
Make sure the beam is level and securely fastened at both ends. Follow local guidelines for making the framing connections, which might require using metal brackets and bolts to attach the beam securely to the supporting posts. Apply construction adhesive for added stability.
After the structural work, you might need an inspection to ensure compliance with building codes.

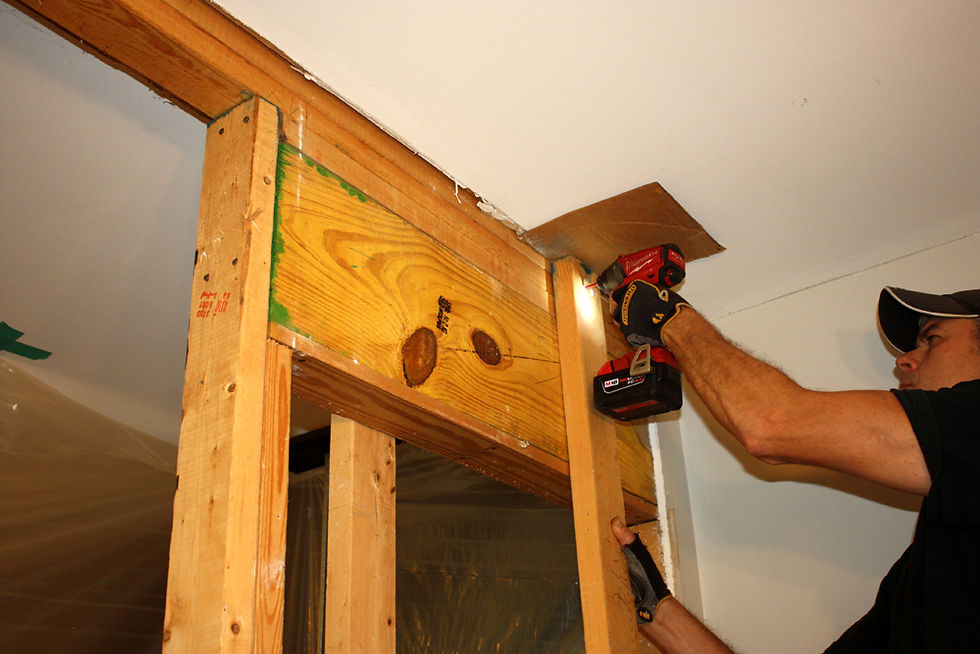
The new beam must be positioned flush with the wall framing. Note the plastic sheeting taped to keep dust out of the living area.
The beam must be supported by solid framing below which transfers the load to the floor joists.

Drive screws through the beam into the ceiling framing to lock everything together.
Trimmer studs, AKA "jack studs," are the framing members that support headers at each end. The number of trimmer studs needed depends on the length (and sometimes the width) of the header. A good rule of thumb is to install two on each side if the opening is wider than 6 ft., the typical patio door size.
Remove the temporary ceiling supports only after everything is secure and inspected. Slowly lower the temporary supports, allowing the weight of the structure to be transferred to the new beam.
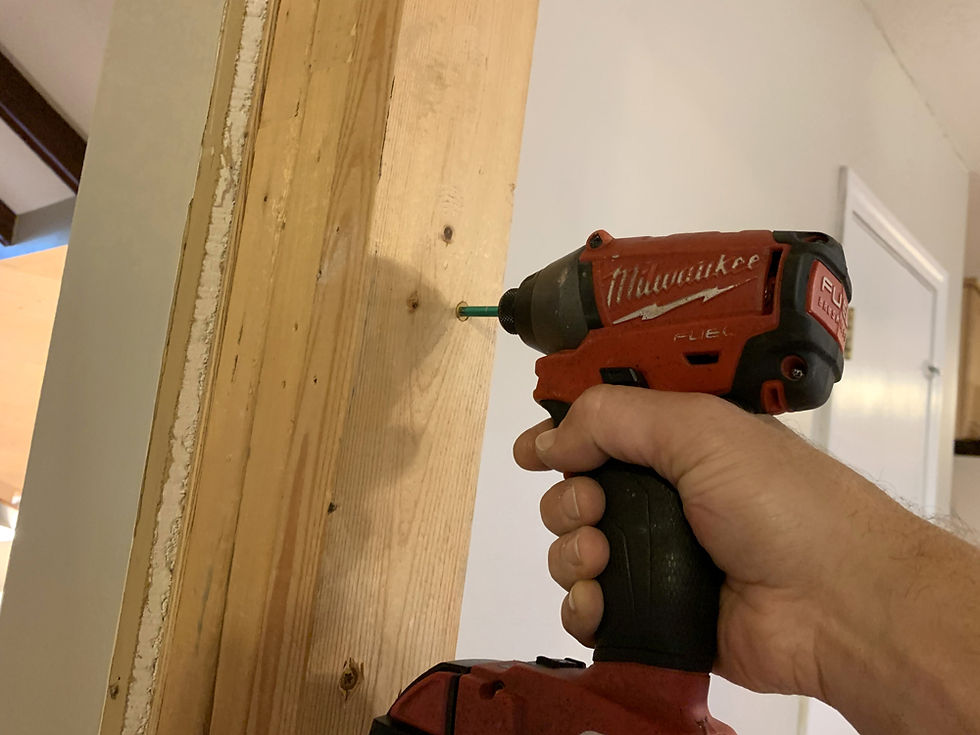
We doubled the studs to strengthen the framing and added shims to provide a larger nailing surface for the surrounding drywall and trim we planned to add.
Framing and Finishing
Insulate the new space as needed, then drywall or plaster over it. Paint, install trim
carpentry, and any other finishing work to blend the new space with the existing area.


Final steps include new drywall, caulk, paint and trim.
Removing a load-bearing wall is definitely pro-grade project that probably exceeds the skill set of many DIY’ers, but the ambitious and experienced might take a whack at it. Removing a wall is a significant structural change that requires expertise. It’s always a good idea to consult a structural engineer to determine an appropriate plan, even if you plan to do the
construction. While this article provides an overview, the actual execution might vary depending on your home's structure. Always prioritize safety and structural integrity, and
hire professionals for parts of the project beyond your skill level.
With careful planning and execution, you can successfully open up your living space, enhancing the look, functionality, and overall flow of your home.
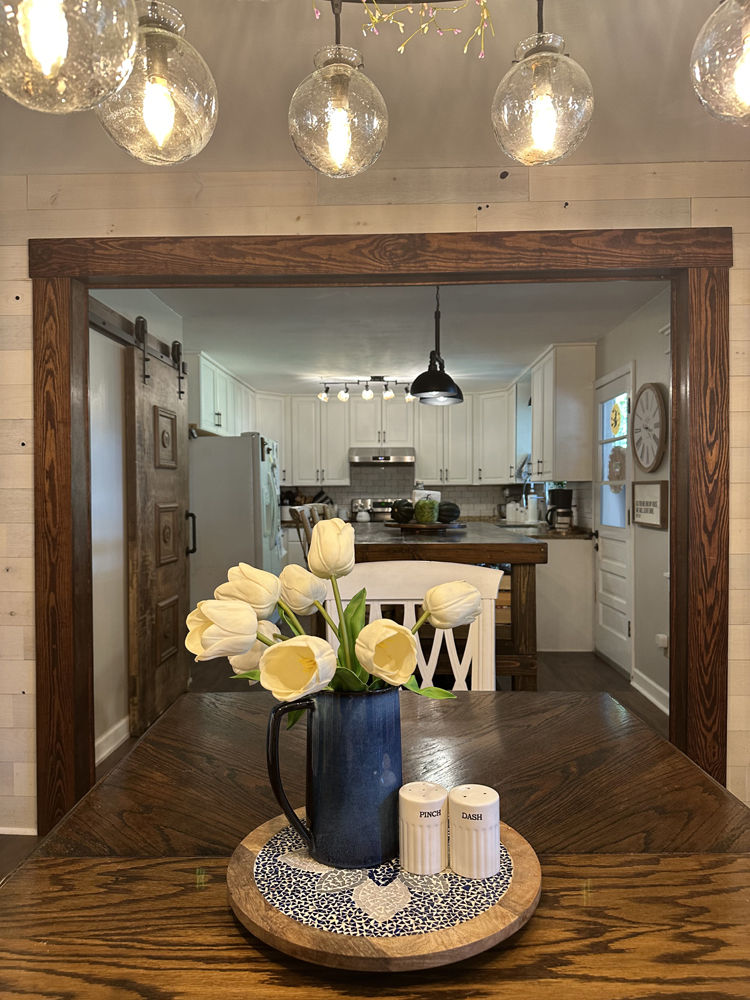
Here's the finished project after installing the trim .
Comentarios